Continuous Hinges Installation: The Ultimate Commercial Door Upgrade!
Do you have a door in your commercial property that refuses to close properly, comes off its hinges, gets stuck, or scrapes against its frame? These issues can be highly disruptive to your business operations. Fortunately, there’s a straightforward solution – adding a continuous hinge to your door.
Our team of highly trained locksmiths boasts extensive knowledge and experience when it comes to installing continuous hinges on commercial doors. This simple and cost-effective enhancement not only increases the durability of your door frame but also makes entering and leaving your establishment smoother and more secure.
Are you curious about the installation process for these hinges? While our experts handle the task seamlessly, it’s wise for property owners to have a basic understanding of how continuous hinges work and how they can enhance the security of your commercial space. Keep reading to dive deeper into the topic!
What Are Continuous Hinges and How Can They Bolster Security?
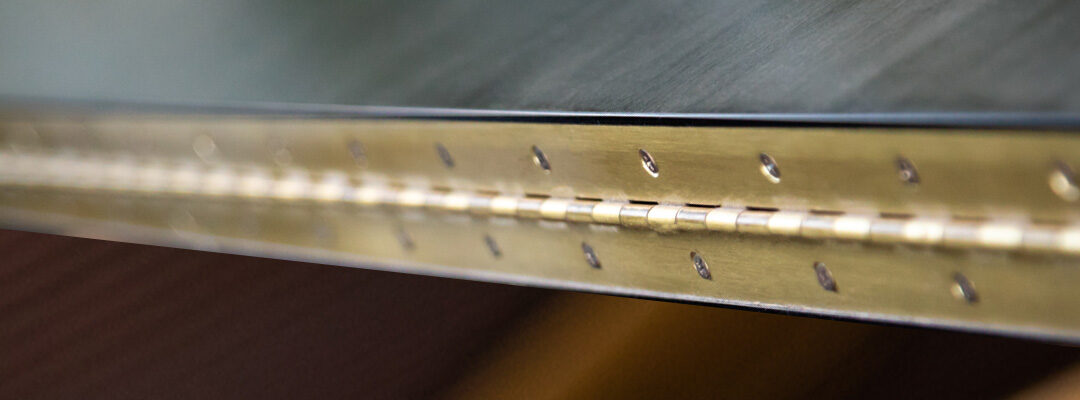
Continuous hinges are robust metal strips that span the entire length of a door or panel. They stand apart from traditional hinges by providing continuous support and weight distribution, making them ideal for heavy doors, gates, or panels.
The advantages of installing continuous hinges are manifold. They contribute to the longevity of doors and panels by minimizing the risk of sagging, warping, or damage. Moreover, continuous hinges play a pivotal role in enhancing security by making it more challenging for intruders to force open doors.
Additionally, they help reduce maintenance costs, as they withstand wear and tear better than standard hinges. In summary, continuous hinges offer a dependable and cost-effective solution that ensures the durability, security, and smooth operation of doors and panels.
How to Install Continuous Hinges on Doors?
The installation of continuous hinges involves several steps, which we will outline below:
1. Preparing the Frame
Begin by opening the hinge and placing the hinge frame leaf against the frame rabbet, ensuring that the alignment rib aligns with the frame face. Position the top of the hinge approximately 1/16 inch below the header, taking into account a 1/16-inch shim for potential bearing settling (up to a maximum of 1/8 inch).
Then, accurately mark and center punch the screw hole locations. For metal frames 12-gauge or thinner, self-drilling screws are suitable, while for thicker metal frames, drill and tap mounting holes for #12-24 threads before screw installation. For wood frames, use optional wood screws to attach the hinge to the frame rabbet.
2. Preparing the Door
With the hinge leaf out of the way, position the door within the frame, adjusting the clearance with shims or wedges. Ensure there is an additional 1/32 inch of clearance on the latch side’s top to accommodate potential frame settling. Maintain a 1/16-inch clearance between the top of the door and the frame header rabbet by using a 1/16-inch shim.
Rotate the hinge leaf onto the door’s face once the door is securely in place. If you opt not to use sex bolts, mark and center punch smaller 15/64-inch holes. For metal doors, it’s advisable to use optional #12 self-drilling screws, or for wood doors, pre-drill pilot holes with a #18-bit for optional #12 wood screws. If you choose standard sex bolt mounting, mark and center punch larger 3/8-inch holes and drill through the door using a 3/8-inch bit at each marked location.
3. Hanging the Door
Now, it’s time to attach the hinge to the door. Keep in mind that sex bolts can be reserved for extra security on the door’s push face, but they won’t be accessible for maintenance or removal once the molding is in place. Afterward, remove all shims and wedges and gently swing the door to test for proper swing and clearance.
4. Installing the Snap-on Molding
To install the door leaf, use the provided 5/64″ hex key to loosen the set screw on the edge of the molding. Then, hook the longer part of the molding under the door leaf’s outer edge along the entire hinge. Subsequently, gently press or tap the shorter part of the molding into place. You can use a rubber mallet or a wood block under a hammer for this step. Finally, tighten the set screw to secure everything in place.
Final Thoughts
These are the essential details you need to understand regarding the installation of continuous hinges. However, if you require skilled locksmiths to handle the installation, please don’t hesitate to contact us. We are a reputable locksmith company in Chicago, offering a wide range of locksmith services at competitive rates. For more information about our services, continue reading our other blog posts.